Unlike other authentication platforms, Rownd provides an intelligent, customizable user profile system. This allows you to collect information about your users, and use it to personalize their experience. It also enables Rownd to handle more of the personalization for you, integrate with other tools you might use, and enforce rules about who can access or update profile data.
We provide a number of built-in fields, but you can also create your own custom fields. You can also customize whether fields are “owned” by the end-user or by your app, which limits who can modify data in the field.
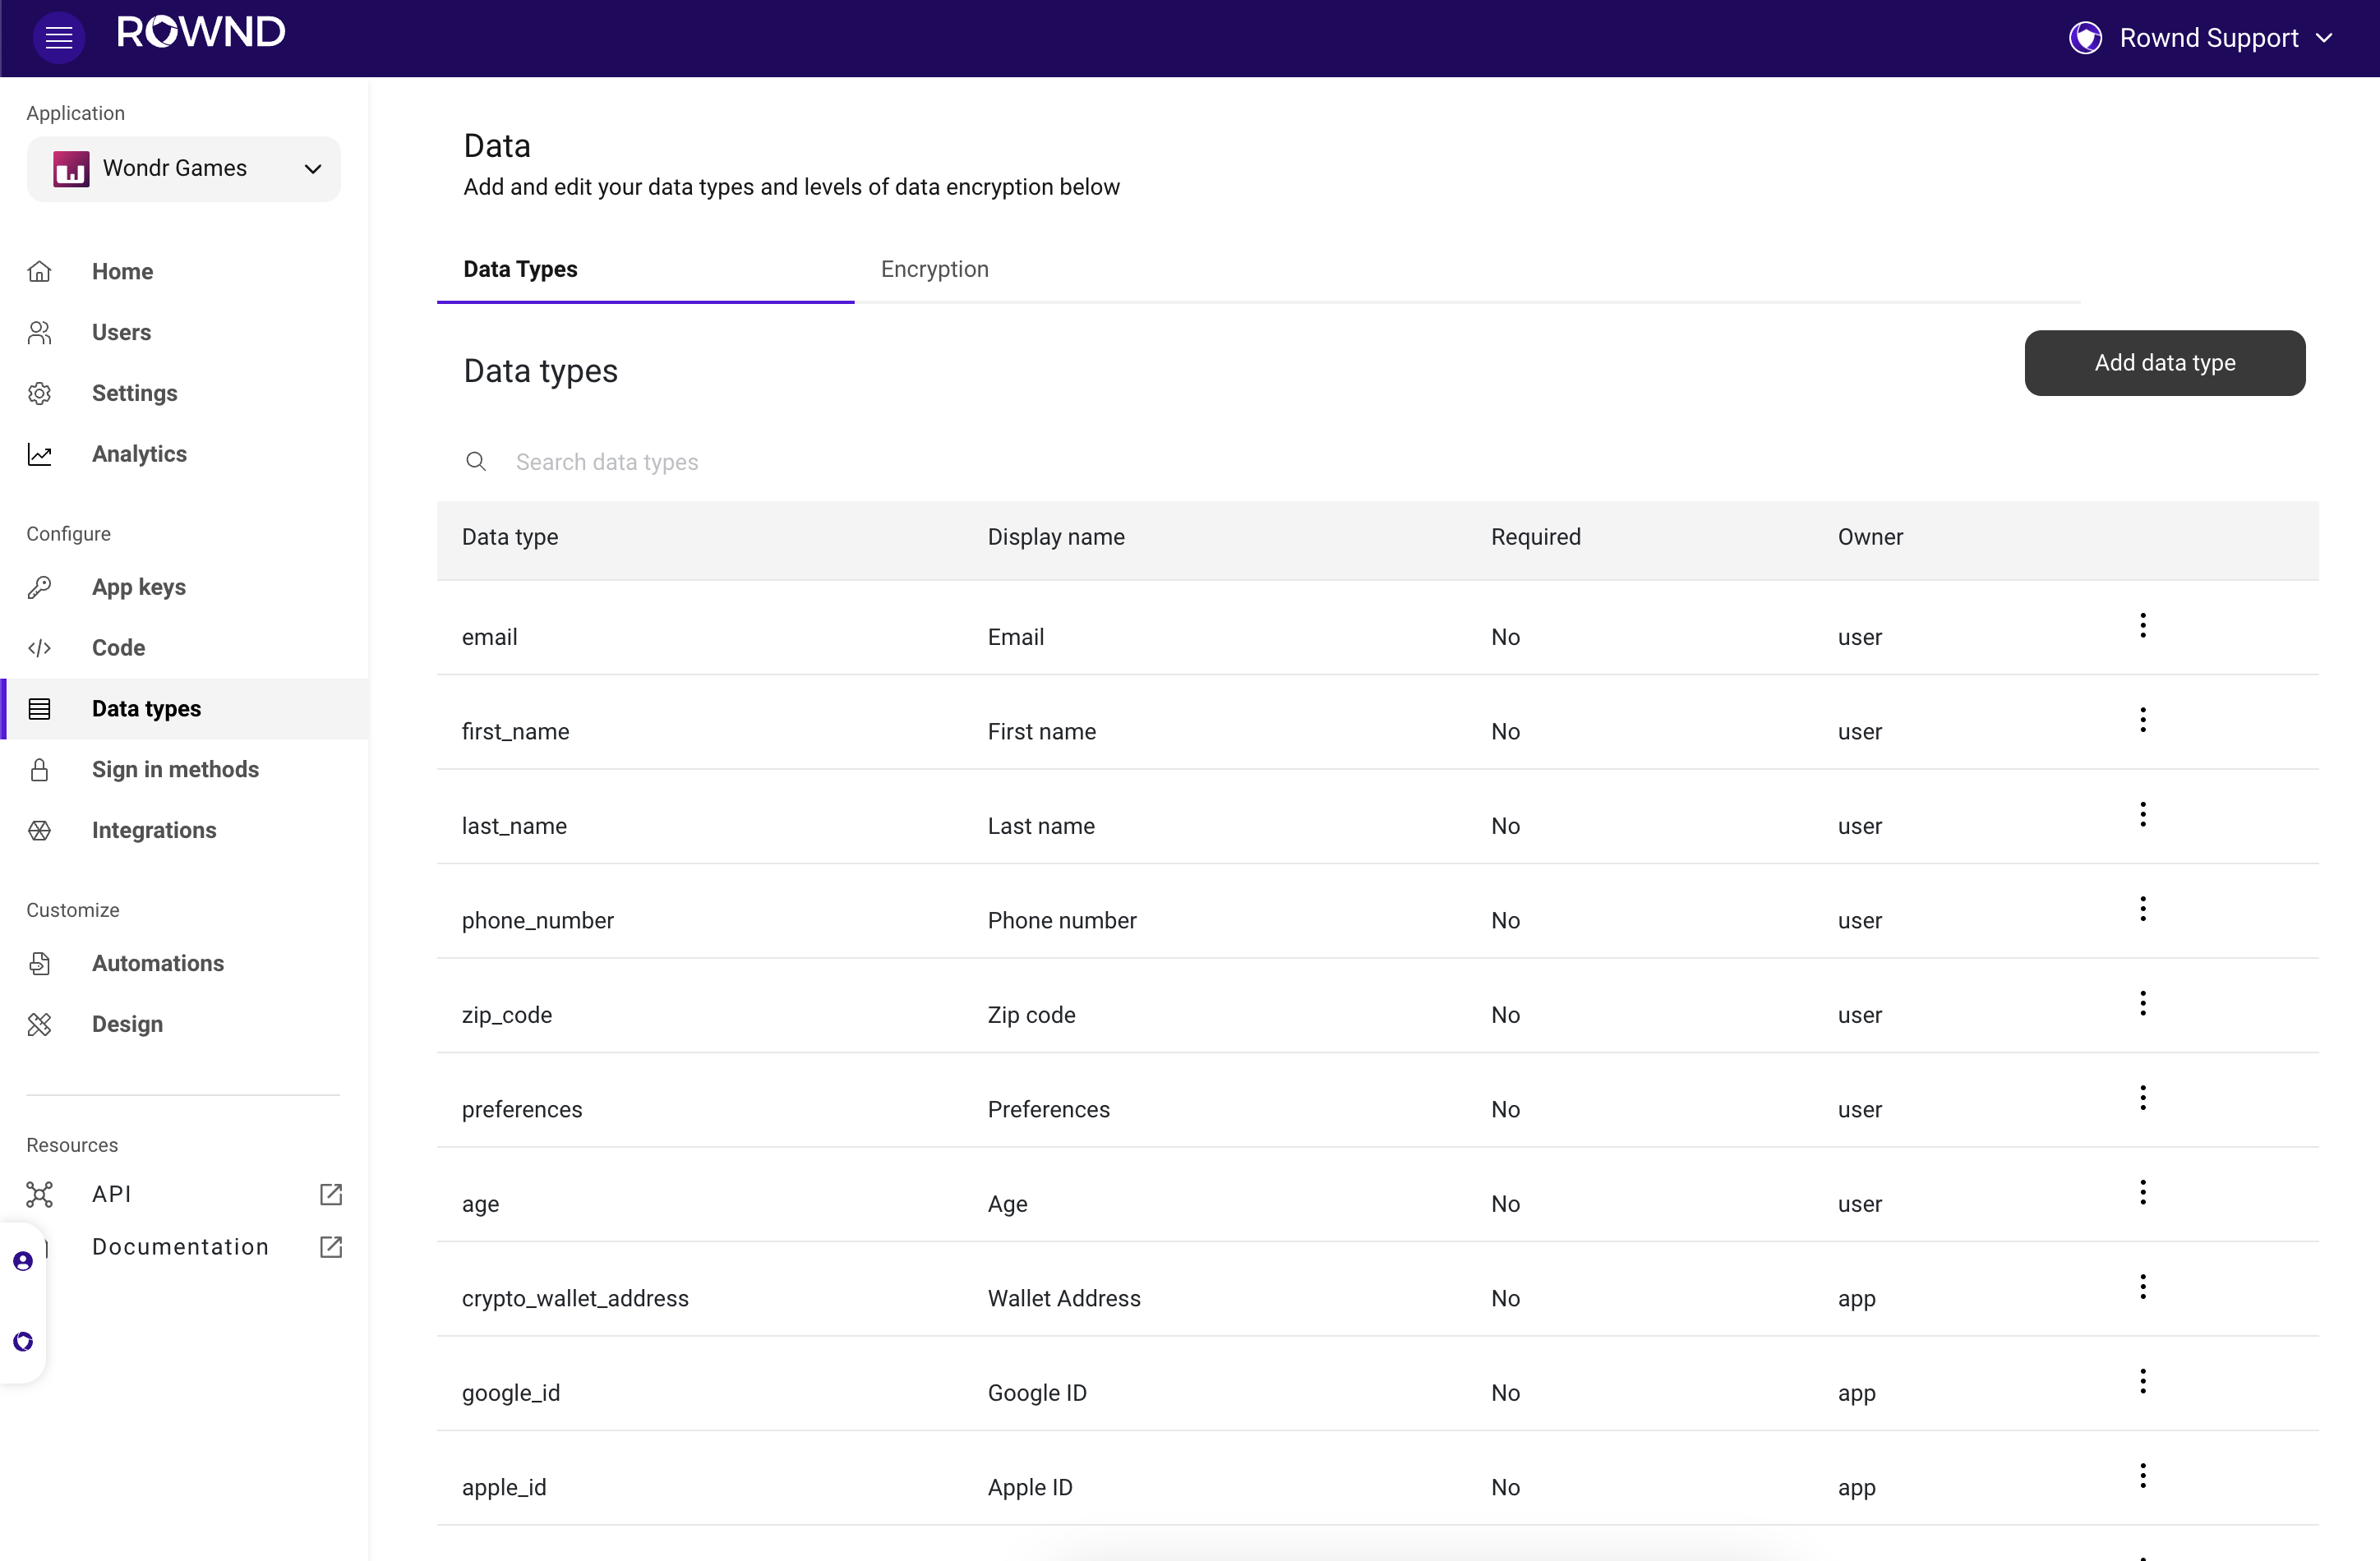
Managing the profile schema
Rownd configures some commonly used profile fields when an app is first created, but you can add to them, modify them, or remove them as needed.
To manage the profile schema, open the Rownd dashboard and select Data types from the side navigation.
Schema field options
When adding or editing a field, the following options are available:
- Data type - This is the name for the field that will be returned in programmatic operations (e.g., REST API responses). This is also used as the display name if one is not explicitly specified. This should be primarily machine-friendly (e.g.,
first_name)
- Display name - This is the name that will be displayed to end-users. If not specified, the “data type” will be used.
- Type - This is the data type for the field. The following types are available:
- String - Accepts any text.
- Number - A numeric value.
- Boolean - A
true/false value.
- Image - A binary blob representing an image. Represented as a URL in API responses.
- Document - A binary blob representing a document (e.g., PDF, DOC, etc). Represented as a URL in API responses.
- Date - A date value.
- Object - A flexible, schema-less JSON object (e.g.,
{ "foo": "bar" }).
- Any - Makes no assumptions about the data stored—could be anything.
- Required retention - Sets the amount of time that data in the field must be retained. This is useful for fields that are required by law (e.g., GDPR requires that data be retained for 6 years). If not specified, data can be removed by the user at any time. _(Note: It is recommended to use this field only when absolutely necessary.)
- Data owner - Specifies who owns the data in the field. If set to User, the end-user can modify the data in the field. If set to Application, the end-user can only view the data in the field, and the app is responsible for updating it.
- Visibility (only applicable when “Data owner” is set to “Application”) - Specifies who can view the data in the field. Visible to users indicates that the data is visible to the end-user in their profile. Hidden from users indicates that the data is only visible to the app when making server-to-server API requests (i.e., the app secret is present).
Adding a new field
- On the data types page, press Add data type.
- From the Data type dropdown, select a built-in field or begin typing. If the field you want isn’t in the list, you can create a custom field by typing in the desired name.
- Complete the rest of the form as desired (see schema field options for details).
- Press Add to save the new field.
Editing an existing field
- On the data types page, locate the field you want to edit and click the three-dots icon on the right side of the table. Select Edit from the menu.
- Make any desired changes to the field (see schema field options for details) on the available options.
- Press Save to persist the changes and close the dialog.
Deleting a field
- On the data types page, locate the field you want to edit and click the three-dots icon on the right side of the table. Select Delete from the menu.
- In the resulting dialog, verify that you are deleting the correct field, then press Delete to confirm.
Deleting a field from the schema does not automatically remove data for that field in each user’s profile; however, it will be missing from any API responses.Regardless, be careful that you don’t have code that depends on the presence of this field.
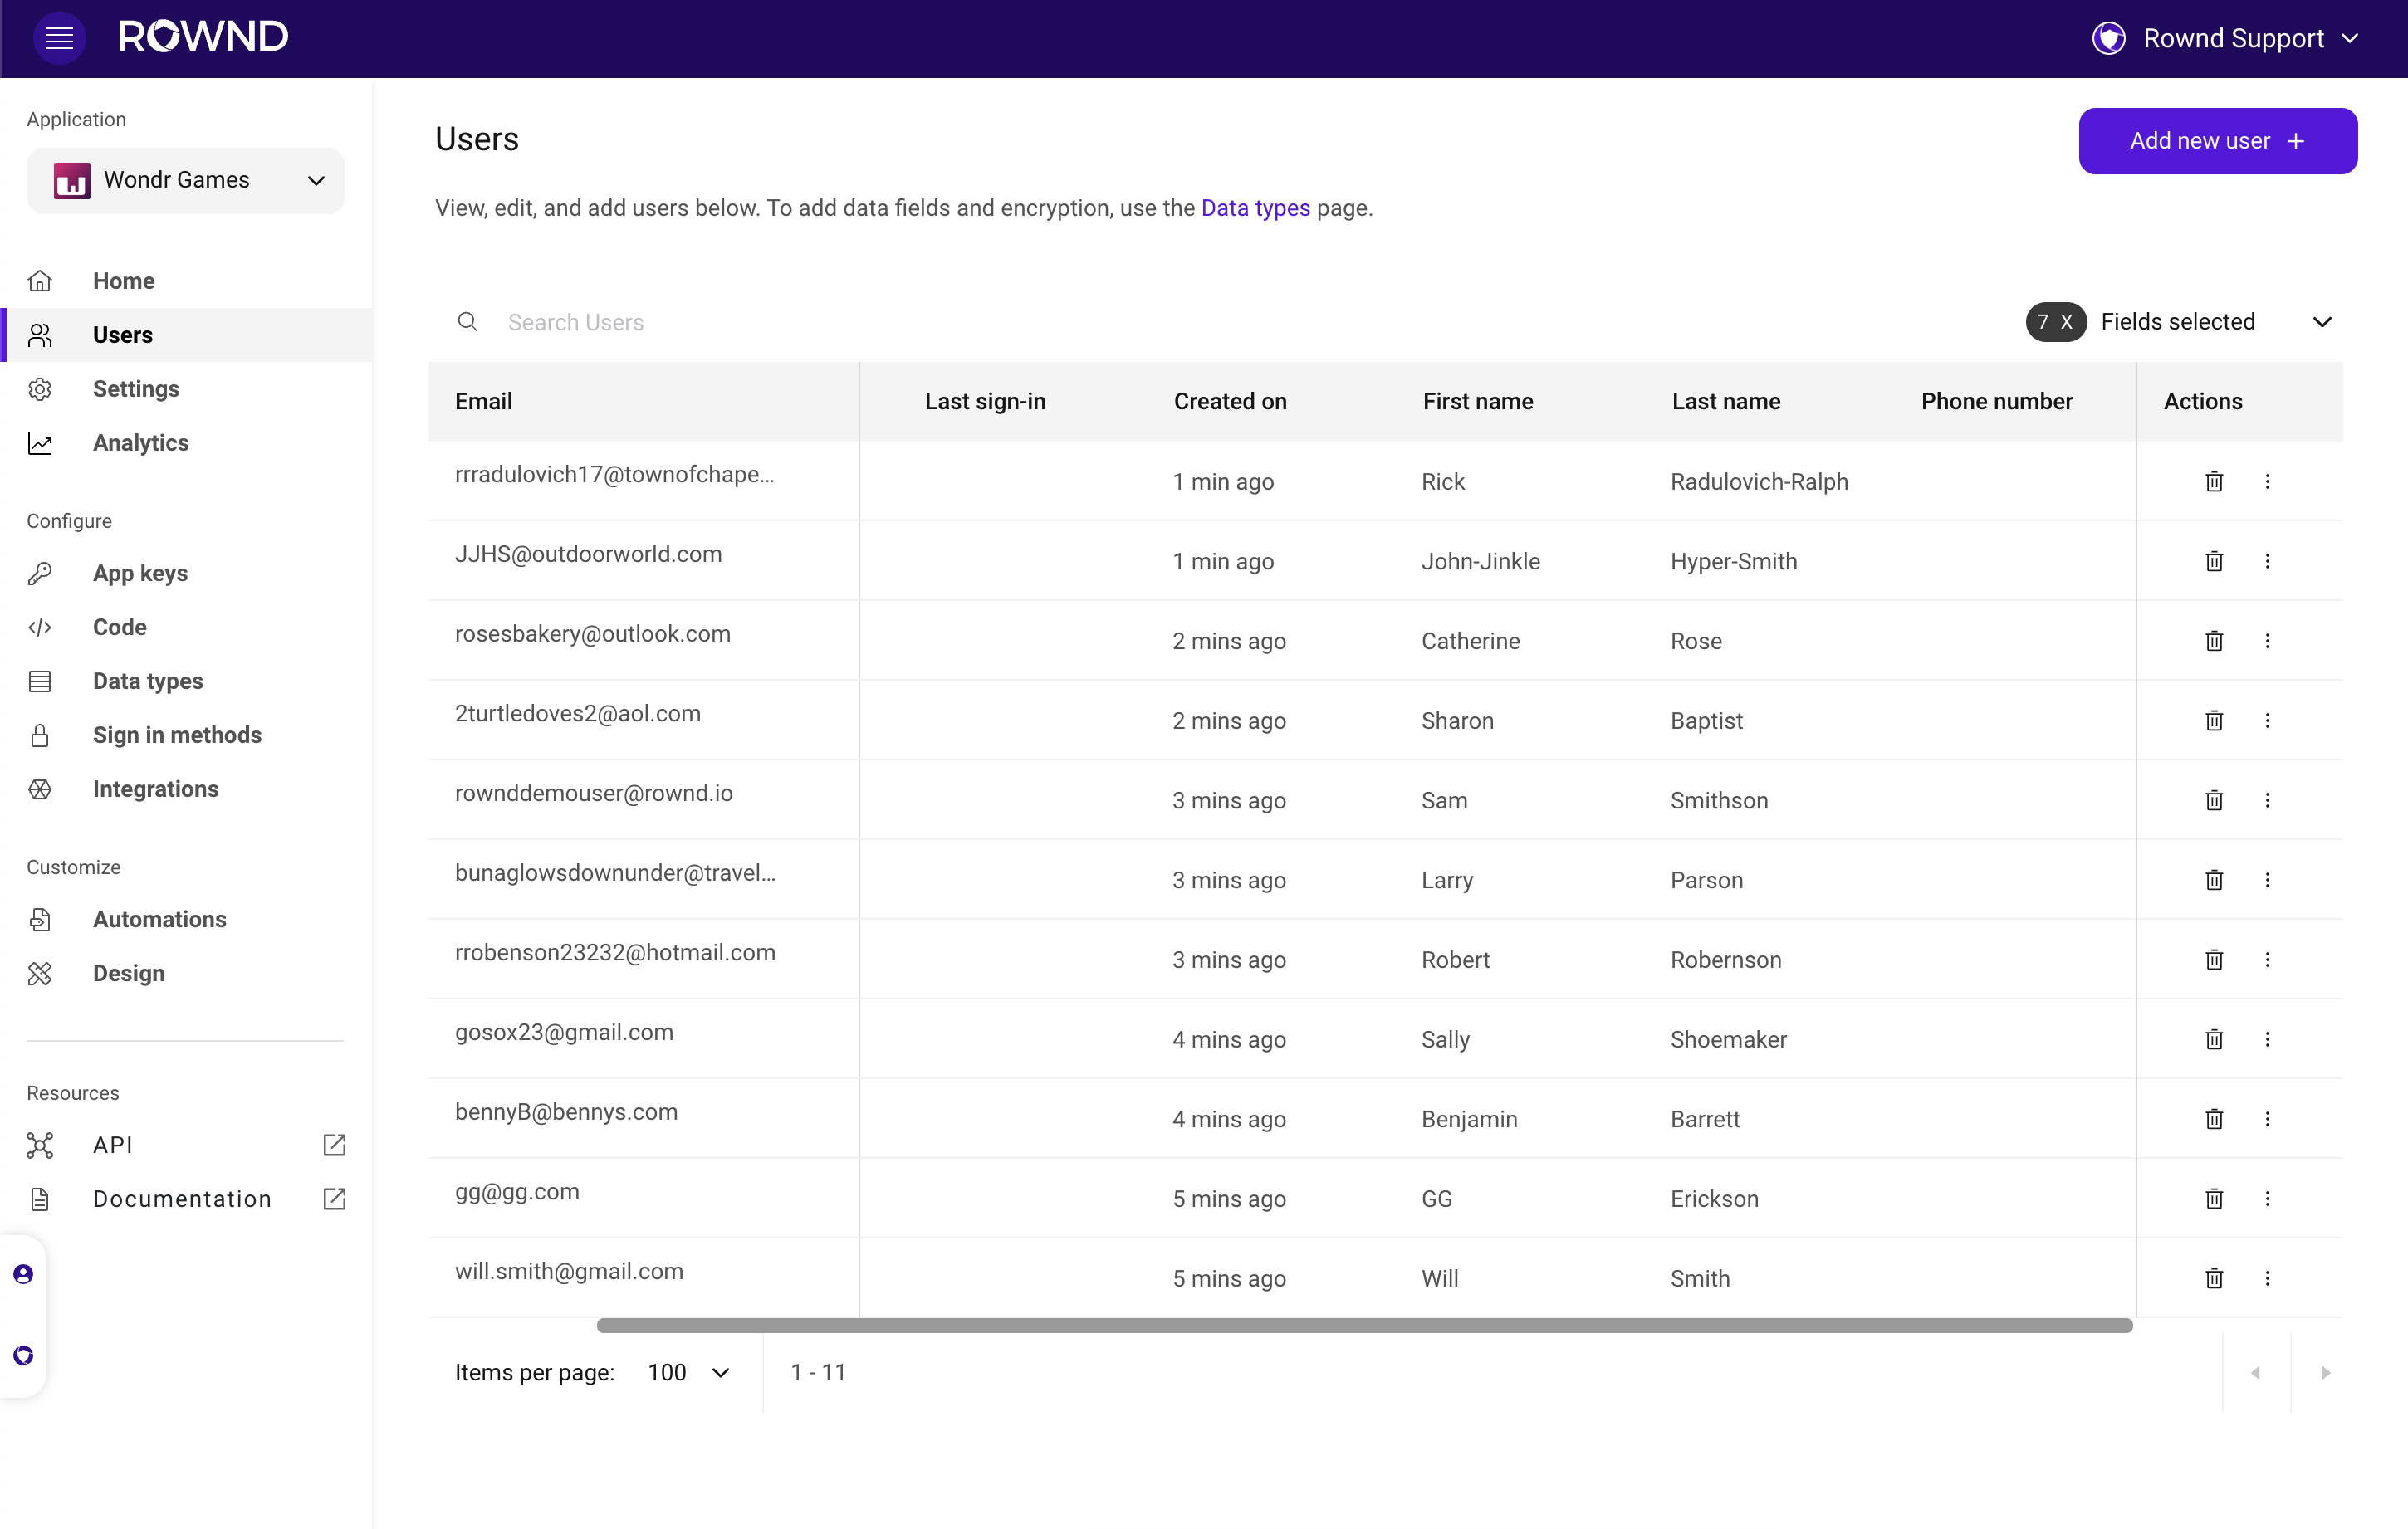
Managing users
In the Users area of the platform, you have complete control over your users’ profile information. Each time a user signs in, they are listed in the Users table. This table allows you to easily locate users, provide support, and manually edit their accounts. It provides information about the sign-in methods they have used and the profile information they have added. Additionally, you can utilize the filtering and sorting tools—located in the top right icons of the table—to efficiently navigate and organize the table.
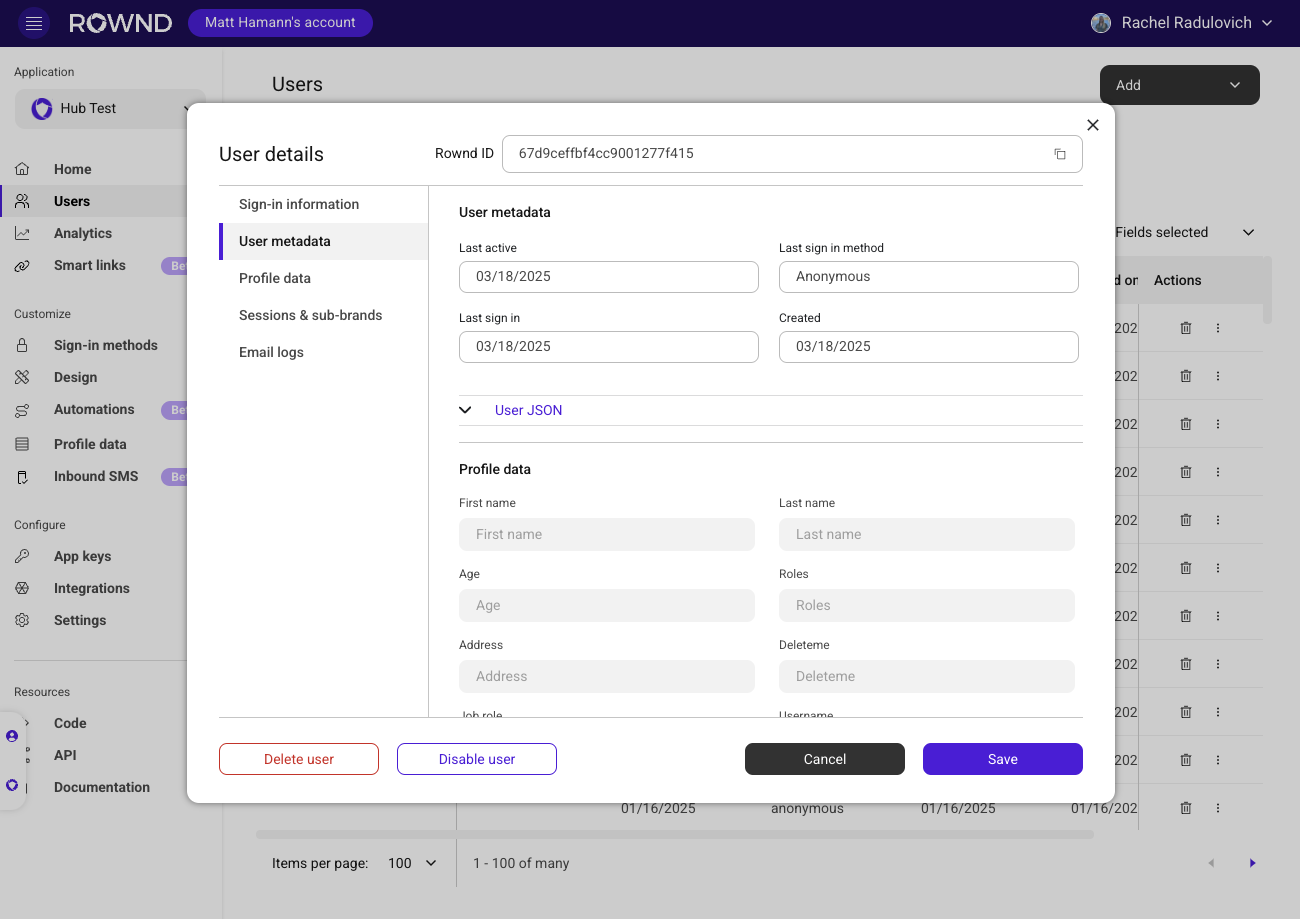
User editor
Clicking on a user in the platform opens the user editor modal. It lets you view and manage individual user data like sign-in methods, activity history, profile fields, sessions, and more.
In the user editor, you’ll find:
-
USER ID: At the top, you’ll find the user’s Rownd ID used to identify this unique user in your app.
-
The ability to delete or disable the user account from the bottom of the modal.
-
Sign-in information: This section shows how the user has signed in. You might see a phone number, email address, Apple ID, Google ID, anonymous ID, or wallet address—depending on what’s been used.
-
User metadata: Displays activity-related info for the user: when they were last active, which method they used to sign in last, when their profile was created, and when they last signed in. You can also view the full user JSON if needed.
-
Profile data: Shows additional data collected for the user, such as their name, age, address, job role, nickname, username, and any custom claims. If the user has a NEAR wallet, you’ll see that info too. Only fields with values will appear.
-
Sessions & sub-brands: Here, you can sign the user out of all active sessions. If you’re using sub-brands, this section also lets you add or remove the user from sub-brands and see when they were last active in each.
-
Email logs: If the user has tried to sign in with email, this tab will show a list of sent email events, including recipient address, delivery status, and timestamp. It’s helpful for checking deliverability and open rates.
Want more from the user editor? If there’s something you’d like to see added to the user editor, let us know by contacting us or reaching out through the in-app chat.